

到目前为止,我们已经了解了可以改变通知视觉外观的选项。还有一些选项可以改变通知的行为。
默认情况下,仅使用视觉选项调用 showNotification() 将具有以下行为
- 点击通知没有任何反应。
- 每个新通知都按顺序显示。浏览器不会以任何方式折叠通知。
- 平台可能会播放声音或振动用户的设备(取决于平台)。
- 在某些平台上,通知会在短时间后消失,而另一些平台则会显示通知,除非用户与之互动。(例如,比较 Android 和桌面设备上的通知。)
在本节中,我们将了解如何仅使用选项来改变这些默认行为。这些选项相对容易实现和利用。
通知点击事件
当用户点击通知时,默认行为是什么都不发生。它甚至不会关闭或删除通知。
通知点击的常见做法是关闭通知并执行其他一些逻辑(即,打开一个窗口或对应用程序进行一些 API 调用)。
要实现这一点,您需要在您的 Service Worker 中添加一个 'notificationclick' 事件监听器。每当通知被点击时,都会调用它。
self.addEventListener('notificationclick', (event) => {
  const clickedNotification = event.notification;
  clickedNotification.close();

  // Do something as the result of the notification click
  const promiseChain = doSomething();
  event.waitUntil(promiseChain);
});
正如您在此示例中看到的,被点击的通知可以作为 event.notification 访问。由此,您可以访问通知的属性和方法。在本例中,您调用它的 close() 方法并执行额外的工作。
操作
操作允许您创建与用户的另一种互动级别,而不仅仅是点击通知。
按钮
在上一节中,您看到了如何在调用 showNotification() 时定义操作按钮
const title = 'Actions Notification';

const options = {
  actions: [
    {
      action: 'coffee-action',
      title: 'Coffee',
      type: 'button',
      icon: '/images/demos/action-1-128x128.png',
    },
    {
      action: 'doughnut-action',
      type: 'button',
      title: 'Doughnut',
      icon: '/images/demos/action-2-128x128.png',
    },
    {
      action: 'gramophone-action',
      type: 'button',
      title: 'Gramophone',
      icon: '/images/demos/action-3-128x128.png',
    },
    {
      action: 'atom-action',
      type: 'button',
      title: 'Atom',
      icon: '/images/demos/action-4-128x128.png',
    },
  ],
};

registration.showNotification(title, options);
如果用户点击了一个操作按钮,请检查 noticationclick 事件中的 event.action 值,以了解点击了哪个操作按钮。
event.action 将包含在选项中设置的 action 值。在上面的示例中,event.action 值将是以下之一:'coffee-action'、'doughnut-action'、'gramophone-action' 或 'atom-action'。
这样,我们就可以检测通知点击或操作点击,如下所示
self.addEventListener('notificationclick', (event) => {
  if (!event.action) {
    // Was a normal notification click
    console.log('Notification Click.');
    return;
  }

  switch (event.action) {
    case 'coffee-action':
      console.log("User ❤️️'s coffee.");
      break;
    case 'doughnut-action':
      console.log("User ❤️️'s doughnuts.");
      break;
    case 'gramophone-action':
      console.log("User ❤️️'s music.");
      break;
    case 'atom-action':
      console.log("User ❤️️'s science.");
      break;
    default:
      console.log(`Unknown action clicked: '${event.action}'`);
      break;
  }
});
内联回复
此外,在上一节中,您看到了如何向通知添加内联回复
const title = 'Poll';

const options = {
  body: 'Do you like this photo?',
  image: '/images/demos/cat-image.jpg',
  icon: '/images/demos/icon-512x512.png',
  badge: '/images/demos/badge-128x128.png',
  actions: [
    {
      action: 'yes',
      type: 'button',
      title: '👍 Yes',
    },
    {
      action: 'no',
      type: 'text',
      title: '👎 No (explain why)',
      placeholder: 'Type your explanation here',
    },
  ],
};

registration.showNotification(title, options);
event.reply 将包含用户在输入字段中键入的值
self.addEventListener('notificationclick', (event) => {
  const reply = event.reply;

  // Do something with the user's reply
  const promiseChain = doSomething(reply);
  event.waitUntil(promiseChain);
});
标签
tag 选项本质上是一个字符串 ID,用于将通知“分组”在一起,从而提供了一种简单的方法来确定如何向用户显示多个通知。这最容易用一个例子来解释。
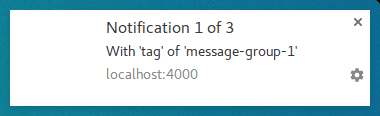
让我们显示一个通知并给它一个标签,即 'message-group-1'。我们将使用以下代码显示通知
const title = 'Notification 1 of 3';

const options = {
  body: "With 'tag' of 'message-group-1'",
  tag: 'message-group-1',
};

registration.showNotification(title, options);
这将显示我们的第一个通知。
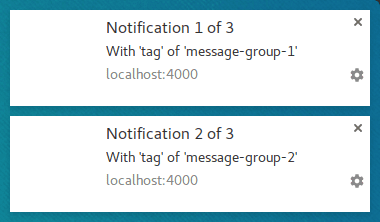
让我们显示第二个通知,并使用新的标签 'message-group-2',如下所示
const title = 'Notification 2 of 3';

const options = {
  body: "With 'tag' of 'message-group-2'",
  tag: 'message-group-2',
};

registration.showNotification(title, options);
这将向用户显示第二个通知。
现在让我们显示第三个通知,但重复使用第一个标签 'message-group-1'。这样做将关闭第一个通知,并将其替换为我们的新通知。
const title = 'Notification 3 of 3';

const options = {
  body: "With 'tag' of 'message-group-1'",
  tag: 'message-group-1',
};

registration.showNotification(title, options);
现在我们有两个通知,即使 showNotification() 被调用了三次。
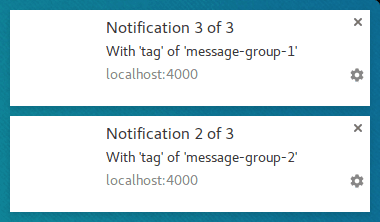
tag 选项只是一种分组消息的方式,这样,如果当前显示的任何旧通知与新通知具有相同的标签,它们将被关闭。
使用 tag 的一个微妙之处在于,当它替换通知时,它会不发出声音或振动。
这就是 renotify 选项的用武之地。
重新通知
在撰写本文时,这主要适用于移动设备。设置此选项会使新通知振动并播放系统声音。
在某些情况下,您可能希望替换通知来通知用户,而不是静默更新。聊天应用程序就是一个很好的例子。在这种情况下,您应该将 tag 和 renotify 设置为 true。
const title = 'Notification 2 of 2';

const options = {
  tag: 'renotify',
  renotify: true,
};

registration.showNotification(title, options);
静默
此选项允许您显示新通知,但阻止振动、声音和打开设备显示屏的默认行为。
如果您的通知不需要用户立即关注,这是理想的选择。
const title = 'Silent Notification';

const options = {
  silent: true,
};

registration.showNotification(title, options);
需要互动
桌面设备上的 Chrome 会显示通知一段时间,然后再隐藏它们。Android 上的 Chrome 没有此行为。通知会一直显示,直到用户与之互动。
要强制通知保持可见,直到用户与之互动,请添加 requireInteraction 选项。这将显示通知,直到用户关闭或点击您的通知。
const title = 'Require Interaction Notification';

const options = {
  requireInteraction: true,
};

registration.showNotification(title, options);
请谨慎使用此选项。显示通知并强迫用户停止他们正在做的事情来关闭您的通知可能会令人沮丧。
在下一节中,我们将了解 Web 上用于管理通知和执行操作(例如在点击通知时打开页面)的一些常用模式。
后续内容
- Web Push Notification 概述
- 推送工作原理
- 订阅用户
- 权限用户体验
- 使用 Web Push Libraries 发送消息
- Web Push 协议
- 处理推送事件
- 显示通知
- 通知行为
- 常用通知模式
- 推送通知常见问题解答
- 常见问题和错误报告