在上一个模块中,我们概述了 Web Worker。Web Worker 可以通过将 JavaScript 从主线程移至单独的 Web Worker 线程来提高输入响应速度,当您的工作不需要直接访问主线程时,这可以帮助提高您网站的“交互到下次绘制”(INP)。但是,仅概述是不够的,在本模块中,我们将提供一个 Web Worker 的具体用例。
其中一个用例可能是一个需要从图像中剥离 Exif 元数据的网站,这并不是一个牵强的概念。事实上,像 Flickr 这样的网站为用户提供了一种查看 Exif 元数据的方式,以便了解他们托管的图像的技术细节,例如色深、相机制造商和型号以及其他数据。
但是,如果完全在主线程上完成,则获取图像、将其转换为 ArrayBuffer 以及提取 Exif 元数据的逻辑可能会非常昂贵。幸运的是,Web Worker 作用域允许在主线程之外完成此工作。然后,使用 Web Worker 的消息传递管道,Exif 元数据作为 HTML 字符串传输回主线程,并显示给用户。
没有 Web Worker 时主线程的样子
首先,观察一下当我们在没有 Web Worker 的情况下完成这项工作时,主线程的样子。为此,请执行以下步骤
- 在 Chrome 中打开一个新标签页,然后打开其 DevTools。
- 打开性能面板。
- 导航到 https://exif-worker.glitch.me/without-worker.html。
- 在性能面板中,点击 DevTools 窗格右上角的记录。
- 将此图片链接(或您选择的包含 Exif 元数据的其他链接)粘贴到字段中,然后点击Get that JPEG!按钮。
- 一旦界面填充了 Exif 元数据,再次点击记录以停止记录。

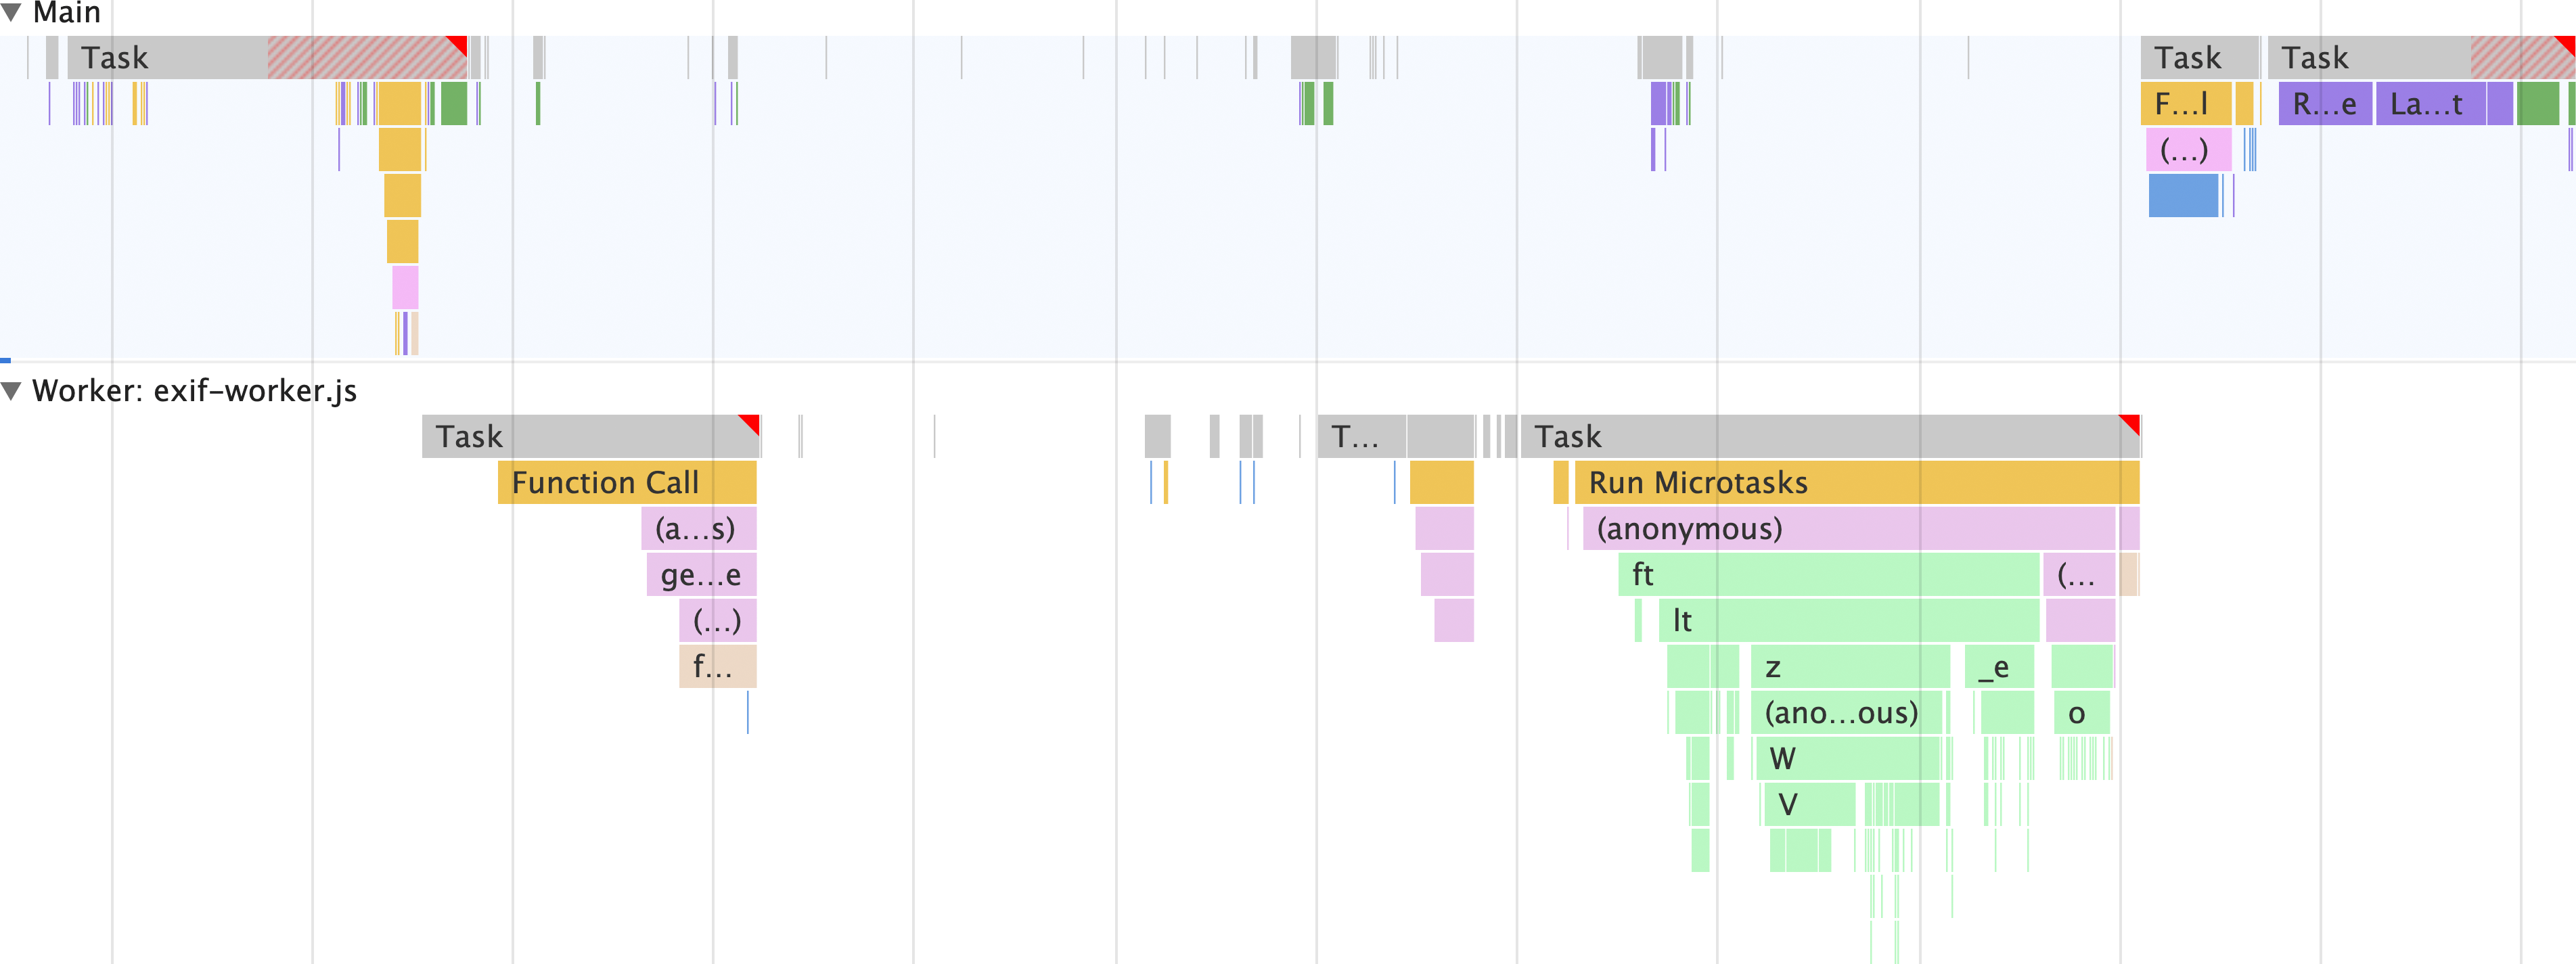
请注意,除了可能存在的其他线程(例如栅格化线程等)之外,应用中的所有内容都发生在主线程上。在主线程上,会发生以下情况
- 表单接受输入并调度
fetch请求以获取包含 Exif 元数据的图像的初始部分。 - 图像数据被转换为
ArrayBuffer。 exif-reader脚本用于从图像中提取 Exif 元数据。- 元数据被抓取以构建 HTML 字符串,然后填充元数据查看器。
现在,将其与相同行为的实现进行对比,但使用 Web Worker!
使用 Web Worker 时主线程的样子
现在您已经了解了在主线程上从 JPEG 文件中提取 Exif 元数据的情况,请看一下当 Web Worker 参与其中时会是什么样子
- 在 Chrome 中打开另一个标签页,然后打开其 DevTools。
- 打开性能面板。
- 导航到 https://exif-worker.glitch.me/with-worker.html。
- 在性能面板中,点击 DevTools 窗格右上角的记录按钮。
- 将此图片链接粘贴到字段中,然后点击Get that JPEG!按钮。
- 一旦界面填充了 Exif 元数据,再次点击记录按钮以停止记录。

这就是 Web Worker 的强大之处。与在主线程上完成所有操作不同,除了使用 HTML 填充元数据查看器之外的所有操作都在单独的线程上完成。这意味着主线程可以空闲出来执行其他工作。
也许这里最大的优势在于,与不使用 Web Worker 的此应用版本不同,exif-reader 脚本不是在主线程上加载,而是在 Web Worker 线程上加载。这意味着下载、解析和编译 exif-reader 脚本的成本发生在主线程之外。
现在深入了解使这一切成为可能的 Web Worker 代码!
Web Worker 代码概览
仅仅看到 Web Worker 带来的不同是不够的,了解(至少在本例中)代码的样子也有助于您了解 Web Worker 作用域中可能实现的功能。
从需要在 Web Worker 进入画面之前发生的主线程代码开始
// scripts.js

// Register the Exif reader web worker:
const exifWorker = new Worker('/js/with-worker/exif-worker.js');

// We have to send image requests through this proxy due to CORS limitations:
const imageFetchPrefix = 'https://res.cloudinary.com/demo/image/fetch/';

// Necessary elements we need to select:
const imageFetchPanel = document.getElementById('image-fetch');
const imageExifDataPanel = document.getElementById('image-exif-data');
const exifDataPanel = document.getElementById('exif-data');
const imageInput = document.getElementById('image-url');

// What to do when the form is submitted.
document.getElementById('image-form').addEventListener('submit', event => {
  // Don't let the form submit by default:
  event.preventDefault();

  // Send the image URL to the web worker on submit:
  exifWorker.postMessage(`${imageFetchPrefix}${imageInput.value}`);
});

// This listens for the Exif metadata to come back from the web worker:
exifWorker.addEventListener('message', ({ data }) => {
  // This populates the Exif metadata viewer:
  exifDataPanel.innerHTML = data.message;
  imageFetchPanel.style.display = 'none';
  imageExifDataPanel.style.display = 'block';
});
此代码在主线程上运行,并设置表单以将图像 URL 发送到 Web Worker。从那里,Web Worker 代码以 importScripts 语句开始,该语句加载外部 exif-reader 脚本,然后设置到主线程的消息传递管道
// exif-worker.js

// Import the exif-reader script:
importScripts('/js/with-worker/exifreader.js');

// Set up a messaging pipeline to send the Exif data to the `window`:
self.addEventListener('message', ({ data }) => {
  getExifDataFromImage(data).then(status => {
    self.postMessage(status);
  });
});
这段 JavaScript 代码设置了消息传递管道,以便当用户提交包含 JPEG 文件 URL 的表单时,URL 会到达 Web Worker。从那里,下一段代码从 JPEG 文件中提取 Exif 元数据,构建 HTML 字符串,并将该 HTML 发送回 window 以最终显示给用户
// Takes a blob to transform the image data into an `ArrayBuffer`:
// NOTE: these promises are simplified for readability, and don't include
// rejections on failures. Check out the complete web worker code:
// https://glitch.com/edit/#!/exif-worker?path=js%2Fwith-worker%2Fexif-worker.js%3A10%3A5
const readBlobAsArrayBuffer = blob => new Promise(resolve => {
  const reader = new FileReader();

  reader.onload = () => {
    resolve(reader.result);
  };

  reader.readAsArrayBuffer(blob);
});

// Takes the Exif metadata and converts it to a markup string to
// display in the Exif metadata viewer in the DOM:
const exifToMarkup = exif => Object.entries(exif).map(([exifNode, exifData]) => {
  return `
    <details>
      <summary>
        <h2>${exifNode}</h2>
      </summary>
      <p>${exifNode === 'base64' ? `<img src="data:image/jpeg;base64,${exifData}">` : typeof exifData.value === 'undefined' ? exifData : exifData.description || exifData.value}</p>
    </details>
  `;
}).join('');

// Fetches a partial image and gets its Exif data
const getExifDataFromImage = imageUrl => new Promise(resolve => {
  fetch(imageUrl, {
    headers: {
      // Use a range request to only download the first 64 KiB of an image.
      // This ensures bandwidth isn't wasted by downloading what may be a huge
      // JPEG file when all that's needed is the metadata.
      'Range': `bytes=0-${2 ** 10 * 64}`
    }
  }).then(response => {
    if (response.ok) {
      return response.clone().blob();
    }
  }).then(responseBlob => {
    readBlobAsArrayBuffer(responseBlob).then(arrayBuffer => {
      const tags = ExifReader.load(arrayBuffer, {
        expanded: true
      });

      resolve({
        status: true,
        message: Object.values(tags).map(tag => exifToMarkup(tag)).join('')
      });
    });
  });
});
这有点长,但这也是 Web Worker 的一个相当复杂的用例。但是,结果是值得的,并且不仅限于此用例。您可以将 Web Worker 用于各种用途,例如隔离 fetch 调用和处理响应,处理大量数据而不会阻塞主线程,而这仅仅是开始。
在提高 Web 应用程序的性能时,开始考虑任何可以在 Web Worker 上下文中合理完成的事情。收益可能是巨大的,并且可以为您的网站带来整体更好的用户体验。
